Steps to Install Rocky Linux-8.4 with screenshots

A brief introduction about Rocky Linux
Rocky Linux is a Community-based Enterprise Operating System, officially released by Rocky Enterprise Software Foundation (RESF) which is a free support platform with a complete binary-compatible release using the Red Hat Enterprise Linux (RHEL) operating system source code. The advantage of Rocky Linux is that it is completely free to install on any 64-bit x86 and ARM64 (aarch64) system.
The birth of Rocky Linux: On December 8, 2020, RedHat announced that they would like to stop the development of CentOS completely and focus on CentOS Stream. The news completely enraged the open-source community tremendously. Following the announcement, Gregory Kurtzer, the original founder of CentOS, announced that he would launch a project similar to CentOS that would fully replace CentOS, benefiting all existing CentOS users and the community. He announced the name of the project as Rocky Linux.
The first version of the Rocky Linux OS was released in April 2021, and the General Availability (GA) version was released on June 21, 2021. Up to May 20, 2029, the version will be supported.
In this article, we will see the step-by-step (using screenshot) installation on Rocky Linux 8.4, which will help you to understand very easily. It’s easier to install Rocky Linux since it is similar to CentOS 8, so the installation process won’t be complicated.
Prerequisites :
HDD minimum : 20 GB
RAM minimum : 2 GB (Recommended 4 GB)
System Type : 64-bit x86 System
Installation kit : Bootable DVD/USB/.iso
Note:
For the demonstration, I will be using a virtual environment (VMware Workstation 15.5.2). This guide assumes that you have your own virtual or standard machine that is ready to install the Rocky Linux 8.4.
Step-1: Download the latest Rocky Linux 8.4
Download Rocky Linux 8.4
From the following link, you can directly download the iso file from Rocky Linux’s official site.
https://rockylinux.org/download/
Step-2: Bootable DVD/USB
Note:
The standard procedure for installing the OS on servers is to use a bootable DVD or USB drive, but if you plan to install it on a VM, you should use the ISO image instead. As for our environment, we are going with a virtualized one. In case you encounter any difficulties creating a bootable USB, we have provided a step-by-step guide on how to create a bootable USB.
Step-3: Let’s start the Rocky Linux 8.4 Installation
Note:
You will see the following screen when you first boot Rocky Linux 8.4 using any “.ISO or bootable media” kit. You can either choose “Install Rocky Linux 8” or “Test this media & Install Rocky Linux 8” and hit the enter key to proceed. You should choose the second option if this is your first time downloading the Rocky Linux 8 media kit.

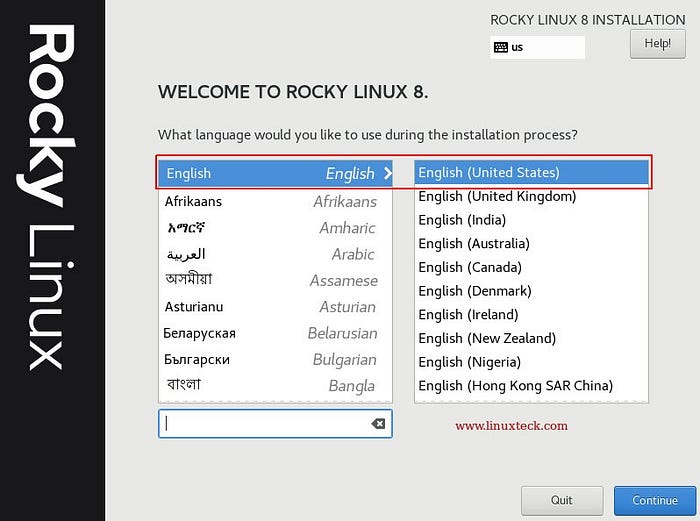
Step-4: Language selection screen
Note:
You can select your preferred language on this screen. Moving forward, we will use the English United States from the list and click the “Continue” button.
Step-5: Configure Installation summary
Note:
On the following screen, you can customize the installation according to your preferences.
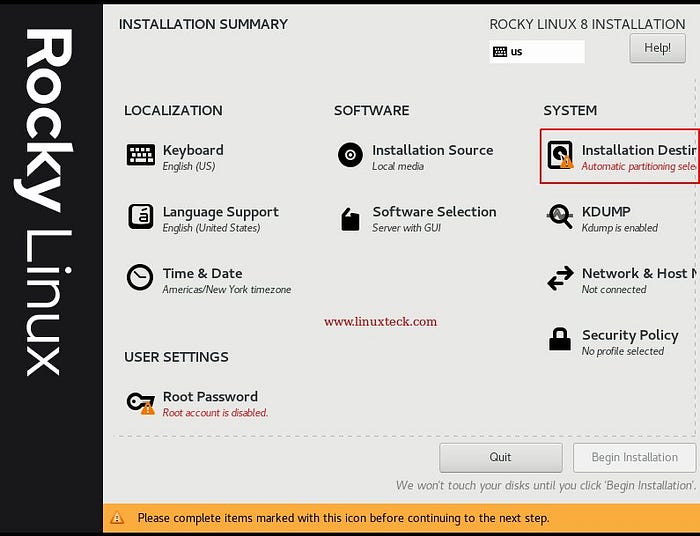
- System (Installation Destination)
- Activate Root Password
- Create a local user
- Date & Time
- Software Selection
- Kdump
- Network & Host Name
- Security Policy
Note:
In the screen above, you can see that some options are already selected or filled by default. We will manually configure the rest of the options above according to our requirements. In this section, I am going to start customizing the partition (Installation Destination).
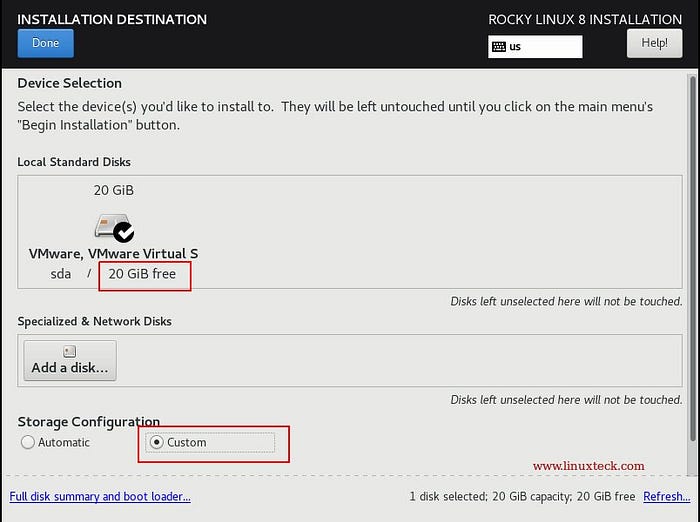
Note:
In the above window, you can see that we have a virtual disk available of 20GB to install Rocky Linux 8.4. We have two options available to determine how the disk partition will be created (Automatic and Custom). If you choose the Automatic option, the system will configure all partitions automatically. Choosing the “Custom option” will enable you to configure partitions manually. I am opting for a custom partition based on my requirements. Click Done to continue.
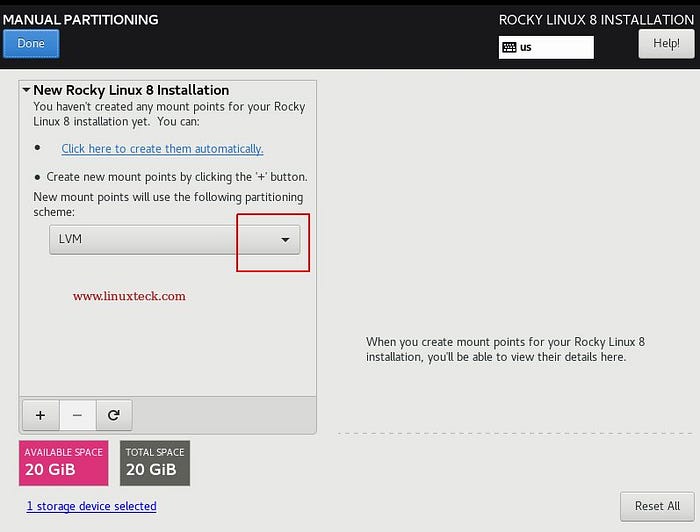
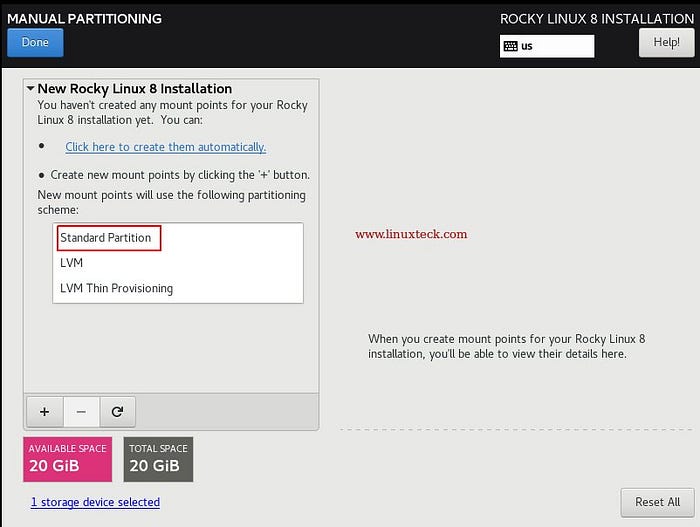
Note:
You have the option to select between three different mounting partition schemes on the screen above, which includes Standard, LVM, and LVM Thin Provisioning. By default, the LVM partition is active. If you wish to change the scheme, select the desired option from the drop-down list. Here, I used standard partitioning.
Note:
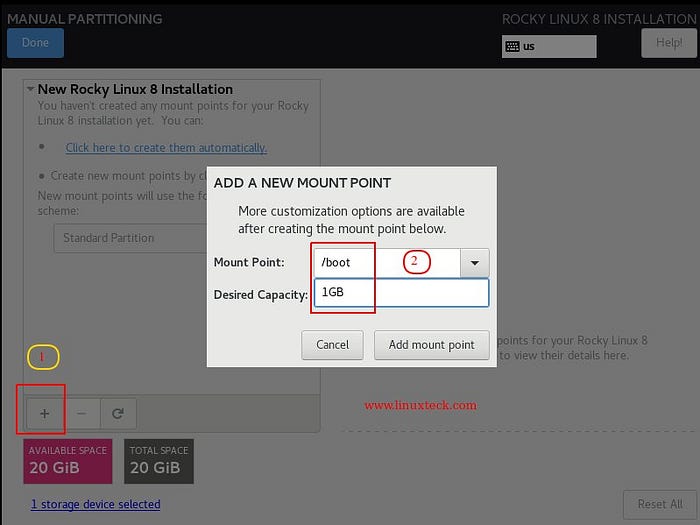
Disk partitioning is one of the most crucial tasks for every Linux administrator. To properly use the server, we must be very calculative about the partition we should create. In general, most newbies and experienced Windows users who migrate to Linux make the wrong choice when choosing a partition scheme. They usually set up boot, swap, and root (/)partitions. Perhaps this combination is suitable for a home or a desktop system. It is not advisable for production servers due to performance and other issues that may arise. Instead, use the following partitioning scheme:
- /boot — 1 GB with ext4 filesystem
- / — 8 GB with xfs filesystem
- /home — 7 GB with xfs filesystem
- /var — 2 GB with xfs filesystem
- Swap — 4 GB with swap filesystem
Note:
I have made a 1GB (boot) partition. You can specify the desired size for the boot partition. Typically 1 or 2 GB is fair enough in most cases. Finally, click “Add mount point” to continue.
Note:
As the next step, create the “/” (parent) partition, also known as the “root” partition. In this lab exercise, I’ll use an 8GB partition. To continue, click “Add mount point”.
This article has been condensed due to length limitations. To view the full version, please click on the following URL: https://www.linuxteck.com/install-rocky-linux-8-4/